How to Tie a Half-Windsor Knot (Way 1)
Brief Description of the Half-Windsor KnotThe half-Windsor knot is a symmetric tie knot that is slightly larger than the Pratt knot and smaller than the Windsor knot. It is suitable for most collars and occasions. The name "half-Windsor knot" has been used to refer to two slightly different ways to tie a tie by different books and web sites. Tying the two tie knots involves the same number of steps and the finished tie knots look very similar. Both ways to tie the half-Windsor knot are provided on this web site for completeness. However, to save time, you can just learn one of them. Way 1 will be described below. For way 2, please refer to the article "How to Tie a Half-Windsor Knot (Way 2)".
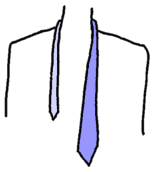
Instructions for Tying a Half-Windsor Knot (Way 1)The instructions for tying a half-Windsor knot (way 1) are shown below. We assume that you are right-handed in the following instructions. The figures below are mirror images. They are what you will see if you stand in front of a mirror. 1. At the beginning, the wide end of the tie should be on your right side and the other end should be on your left side.
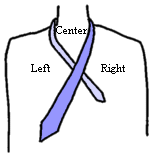
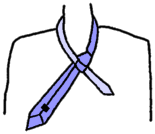
2. Cross the wide end over the other end. Now three regions are formed (Left, Right and Center).
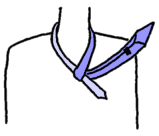
3. Bring the wide end underneath the narrow end from Left to Right.
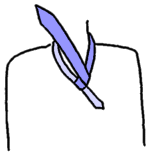
4. Bring the wide end over to the Center region.
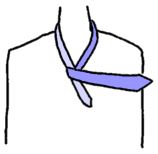
5. Bring the wide end under the knot to the Left region.
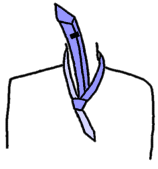
6. Bring the wide end out of the shirt from Left to Right.
7. Bring the wide end under the knot to the Center region.
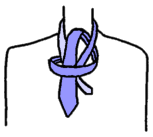
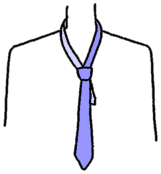
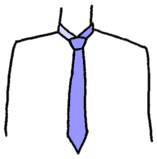
8. Bring the wide end down and pass the loop in front. Ensure that the knot is tightened.
What Do You Want to Do Next?
Want to Help Us?
|